I. Introduction:
Upcycling or revamping old clothing has become a popular trend in recent years due to people’s awareness of the environment and the need to reduce waste. Instead of throwing away old t-shirts, people are finding creative ways to breathe new life into them. Revamping your old t-shirts through DIY techniques not only saves money but also contributes to a sustainable fashion culture.
This article aims to provide 10 fun and easy DIY ways to revamp your old t-shirts. Whether you have old t-shirts that are too plain or too busy, too small or too big, there is a way to turn them into trendy and unique pieces that can be worn again without having to donate or throw them away.
The 10 techniques covered in this article include bleaching, cutting, tie-dyeing, embroidery, fabric paint, beading, fringe, screen-printing, and patchwork. Each technique offers a different way to transform your old t-shirts into something new, and the possibilities are endless. Not only are these techniques fun and creative, but they also require minimal materials and no previous experience in DIY or crafting.
While the fashion world is constantly evolving, upcycling old clothing is becoming more and more popular. By giving t-shirts a new lease of life, we can reduce waste and produce less while enjoying new and stylish clothing at the same time. Embracing sustainable fashion habits through DIY techniques is not only satisfying but also helps to preserve the environment while expressing one’s unique style.
In conclusion, upcycling old clothing has become more important, and revamping old t-shirts through DIY techniques offers a way to reduce waste and enhance the longevity of clothing. This article offers an overview of 10 fun and easy techniques to give old t-shirts a fresh new look. It is important to remember that there are no rules, and the beauty in revamping old t-shirts is the creative expression of individual style.
II. Bleaching Techniques:
Bleaching is a great way to revamp your old t-shirts and add some fun and unique designs. There are various methods to achieve a bleached look, including using stencils, tape, or free-hand techniques. Here are some tips on bleaching your t-shirts to achieve the desired results:
Using Stencils:
– Choose the desired stencil design and cut it out of thick paper or use a pre-made stencil.
– Place the stencil on the t-shirt in the desired area and secure it with tape.
– Mix equal parts bleach and water in a spray bottle.
– Spray the mixture onto the t-shirt, focusing on the stencil design, and let it sit for 5-10 minutes.
– Rinse the t-shirt with cold water to stop the bleaching process.
– Wash the t-shirt with cold water and mild detergent, then dry it as usual.
Using Tape:
– Decide on the desired design and use tape to create the outline of the design.
– Cover the rest of the shirt with tape to protect it from the bleach.
– Mix equal parts bleach and water in a spray bottle.
– Spray the bleach solution onto the exposed areas of the t-shirt.
– Let the bleach sit for 5-10 minutes, or until the desired color is achieved.
– Rinse the t-shirt with cold water and remove the tape.
– Wash the t-shirt with cold water and mild detergent, then dry it as usual.
Free-Hand Techniques:
– Wearing gloves, paint the bleach solution onto the t-shirt in the desired pattern or design.
– Use a paintbrush or sponge to create different effects or textures.
– Let the bleach sit for 5-10 minutes, or until the desired color is achieved.
– Rinse the t-shirt with cold water to stop the bleaching process.
– Wash the t-shirt with cold water and mild detergent, then dry it as usual.
Tips for Bleaching:
– Always wear gloves and work in a well-ventilated area.
– Use a mix of 50% bleach and 50% water to prevent over-bleaching.
– If you want a more faded look, use less bleach and let it sit for a shorter amount of time.
– To create an ombre effect, apply the bleach at the bottom of the shirt and gradually fade it upwards.
– Keep in mind that bleach can weaken the fabric, so avoid using too much.
In conclusion, bleaching is a simple and cost-effective way to revamp your old t-shirts and add a unique touch to your wardrobe. With these tips and techniques, you can achieve different designs and patterns, making each t-shirt truly one-of-a-kind.
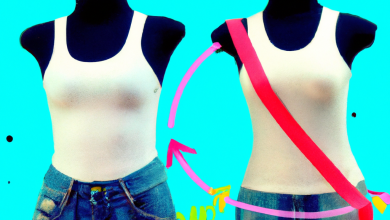
III. Cut-Out Shirts:
Cut-out shirts are a fun and easy DIY way to revamp old t-shirts. With just a pair of scissors and some creative ideas, you can transform a simple t-shirt into a fun and stylish piece of clothing that you will be proud to wear.
To create a cut-out shirt, start with an old t-shirt that you no longer wear or that is boring. The shirt should be clean and dry, and you should have a pair of sharp scissors handy.
Begin by deciding on the design you want to create on your shirt. You can cut out shapes, patterns, or even words. If you’re not confident in your cutting skills, consider using a stencil or tracing a design onto the shirt with a washable marker.
Once you have decided on the design, carefully cut along the lines to create the cut-out. You may need to fold the shirt in half or use pins to keep it secured while you cut. Be sure to cut through both layers if you want the design to show on both the front and back of the shirt.
After cutting out the design, you can leave it as is or add some extra touches to make it stand out. You could tie knots or bows at the bottom of the shirt to create a new style; alternatively, you could add a different colored fabric behind the cut-out to create a contrasting look.
Don’t throw away the cut-out fabric pieces – you can use them for other DIY projects. For example, you could use the cut-out pieces to make a braided headband or a cozy scarf.
Overall, cut-out shirts are an easy, inexpensive, and creative way to revive an old t-shirt. You can create a unique look that’s tailored to your personality and style. So dig through your closet, find an old t-shirt, grab a pair of scissors, and get creative!
IV. Tie-Dyeing Techniques:
Tie-dyeing is one of the most popular and fun ways to revamp old t-shirts. It is a process of dyeing fabric with bright, bold colors which results in a unique and eye-catching pattern. Tie-dyeing can be done in a variety of ways, from creating a uniform pattern to creating a more abstract pattern. Here are some tips for creating your own tie-dye shirts:
1. Choose your color combinations
The first step in tie-dyeing is choosing your color combinations. You can use any color, but it’s best to use colors that will contrast or complement each other. For example, yellow and blue, pink and green, or purple and orange would create a great color contrast. Think about the mood and style you want to create with your tie-dyed t-shirt.
2. Twist and tie your t-shirt
The next step is to twist and tie your t-shirt. You can use rubber bands or string to do this. Twist it first from the center then wrap bands around it. Remember that the tighter the twists and ties, the more intense the pattern will be. Make sure the twists and ties are even and tight so that the colors don’t bleed into each other.
3. Prepare the dye
Before you begin dyeing, read the instructions on the dye package carefully. Most dyes require mixing with water, salt, and sometimes soda ash. Be sure to mix the dye according to the manufacturer’s instructions, or you can try a recipe online. Place the dye in squeeze bottles or bowls with spoons for dipping.
4. Apply the dye
With gloves and apron on, apply the dye to the twisted fabric using the squeeze bottles or immersion method. Make sure to saturate the fabric thoroughly with dye, otherwise, the colors will be muted. Keep adding dye to different areas of the shirt until you’re satisfied and make sure that dye seeps into each and every crevice before dropping it in the plastic wrap.
5. Let the dye set
Once you’ve applied the dye, wrap the t-shirt tightly in plastic wrap and let it sit for at least 6 hours (overnight is best). This allows the dye to penetrate the fabric and set, giving you vibrant colors.
6. Rinse and hang
After letting the dye set, rinse the t-shirt in cold running water until the water runs clear. It’s important to rinse the shirt with your gloves still on. Finally, hang the shirt to dry.
With these simple techniques, you can create your own unique tie-dye t-shirts. Tie-dyeing is a great way to add some color and personality to your old t-shirts without having to spend a fortune on new clothing.
V. Embroidery:
If you’re looking for a way to add unique designs to your old t-shirts, embroidery is a great technique to try out. Embroidery is the art of adding decorative stitches onto fabric, and it can be used to create intricate designs or add subtle details to your t-shirts.
Here are some tips for beginners who want to try embroidery on their old t-shirts:
1. Materials:
To get started with embroidery, you’ll need some basic materials including embroidery needles, embroidery thread in various colors, an embroidery hoop, and a t-shirt that you’d like to add embroidery to. You can find embroidery supplies at your local craft store or online.
2. Design your pattern:
Before you start stitching, you’ll need to decide on the design or pattern you want to add to your t-shirt. This can be anything from simple lines or shapes to more intricate designs such as flowers or animals. You can find inspiration for embroidery patterns on social media or in craft books.
3. Prep your t-shirt:
Once you’ve decided on your pattern, you will need to prepare your t-shirt. Use an embroidery hoop to stretch the t-shirt fabric tightly and to keep the fabric in place. Choose a spot on the t-shirt where you’d like to add the embroidery design and place the t-shirt inside the hoop.
4. Stitching:
To start stitching, thread your embroidery needle with your desired color of embroidery thread. You can use a variety of stitches such as the back stitch, stem stitch, chain stitch, or satin stitch. The technique you use will depend on the design you’ve chosen. Use your embroidery hoop to hold the fabric tightly and start stitching your design.
5. Finishing touches:
Once you’ve finished stitching your design, tie off your thread and remove the t-shirt from the embroidery hoop. To prevent the embroidery from unraveling, you can use a fabric glue or iron-on backing to secure the threads on the reverse side of the t-shirt.
Adding embroidery to your old t-shirts is a great way to give them new life and to express your creativity. With some basic embroidery supplies and a bit of patience, you can create unique and beautiful designs that will make your old t-shirts stand out.
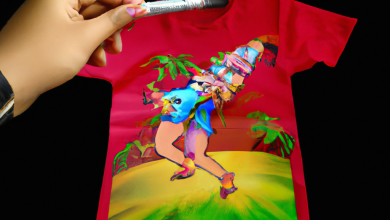
VI. Fabric Paint:
Fabric paint is a popular DIY method to revamp old t-shirts. It allows you to create custom designs and images, making your old t-shirt look brand new. In this section, we will discuss how to use fabric paint to get the best results, as well as different types of paint and tools that are available.
To begin, you’ll want to gather your supplies. You’ll need fabric paint, a t-shirt (make sure it’s clean and dry), a brush (foam or bristle), a palette or plastic tray, and stencils or free-hand drawing materials if you don’t want to paint free-hand.
The next step is to plan out your design. You can create any design you like, whether it’s a simple image or a more complex pattern. It’s important to note that fabric paint can look different on fabric than it does in a bottle, so it’s always a good idea to test your paint on a small section of fabric first.
Once you’ve determined your design, you can start painting. If you are using stencils, place the stencil on your shirt and use painter’s tape to hold it in place. Then, pour a small amount of paint onto your palette and use your brush to apply it to the stencil. Make sure to paint the areas within the stencil as neatly as possible. If you’re painting free-hand, you can apply the paint directly onto the fabric using your brush. You may need to do multiple coats depending on the opacity of your paint.
After you’ve finished painting, let the t-shirt dry completely before wearing or washing. Some fabric paints may need to be heat-set with an iron or dryer to ensure the design doesn’t wash out.
When it comes to the types of fabric paint available, there are various options to choose from. There are fabric paints that come in tubes, bottles, and spray cans. Each type of paint has its own unique properties, such as the thickness of the paint or the size of the tip on the applicator. Some fabric paints are also water-resistant or UV-resistant, making them ideal for outdoor activities.
In conclusion, fabric paint is a fun and easy way to revamp your old t-shirts. With a little creativity and patience, you can create a unique design that reflects your personal style. Remember to use the right tools and materials, and always test your paint on a small section of fabric before applying it to your t-shirt. With these tips in mind, you’ll be on your way to creating a custom t-shirt that you’ll be proud to wear.
VII. Beading:
Beaded designs are a fun and unique way to revamp old t-shirts. With so many different types of beads and techniques, the possibilities for customization are endless. In this section, we will cover a tutorial on how to add beaded designs to t-shirts and provide suggestions for different types of beads and stringing techniques.
To start, you will need a plain t-shirt, needle and thread, and the beads of your choice. It can be helpful to sketch out a design beforehand to give yourself a visual guide. Once you have your supplies, you can get started on the beading process.
One popular technique for adding beads to a shirt is to create a beaded collar. This involves stringing beads onto a piece of fabric or ribbon before attaching it to the neckline of the shirt. You can use seed beads, gemstones, or any other type of bead to create a unique design. To attach the collar, simply sew it onto the neckline of the shirt using a needle and thread.
Another way to add beaded designs to a t-shirt is to create a pattern using beads. This can be as simple or intricate as you’d like. For example, you could spell out a word or create a small symbol using beads. To do this, thread the beads onto a piece of string or wire that is long enough to cover the area of the design. Once you have the beads strung together, carefully attach them to the shirt using a needle and thread.
A third option is to create a fringe of beads along the bottom of the shirt. This can be a fun and playful way to add texture to a plain t-shirt. To do this, thread beads onto a piece of string or wire as before, but leave a tail at the end. Once you have your beads strung together, attach the tail to the bottom hem of the shirt using a needle and thread. You can create a single layer of fringe or multiple layers for more dimension.
Overall, adding beaded designs to a t-shirt is a simple and creative way to revamp an old piece of clothing. Experiment with different types of beads, patterns, and techniques to find the perfect design for you. With a little bit of time and effort, you can transform a plain t-shirt into a unique and personalized work of art.
VIII. Fringe:
Fringe is a great way to add texture and movement to an old t-shirt, transforming it into a fun and bohemian-inspired garment. Here’s how to add fringe to your t-shirt in just a few easy steps:
1. Choose your t-shirt: Begin by selecting a t-shirt that you want to revamp. A plain cotton t-shirt works best, but you could also experiment with a graphic tee or any other type of shirt.
2. Cut off the hemline: Cut off the bottom hem of the t-shirt using a pair of sharp scissors. Make sure to cut across the shirt in a straight line so that the fringe will be even.
3. Cut vertical strips: Starting from the bottom of the shirt, cut vertical strips approximately 1 inch apart, making sure to stop cutting about 1 inch before reaching the top of the shirt. The width and length of the strips are up to you and can vary depending on how long you want your fringe to be.
4. Pull the strips: After you have cut all the strips, grab each one and pull downwards to stretch it out. This will create the fringe effect.
5. Try it on: Once you’ve finished stretching all the strips, try on your newly-fringed t-shirt and see how it looks!
Suggestions for what to do with the cut-off fabric:
Now that you have all these fabric scraps from the fringe, you can use them for various other DIY projects! Here are some ideas:
1. Braided headband: Cut three strips from the fabric scraps, braid them together and create a cute boho headband.
2. Bracelet: Use some of the cut-off fabric to create a braided bracelet.
3. Keychains: Create a cute tassel keychain using some of the leftover fabric.
4. Scrunchie: Use the fabric to create a fun scrunchie to wear in your hair.
5. Wall hanging: Use the fabric scraps to create a boho-inspired wall hanging for your room.
Overall, adding fringe to a t-shirt is a simple way to transform it into a playful and unique piece. Experiment with different lengths and widths of fringe, and try out different colors of t-shirts to make your fringe really stand out. And don’t forget to use those fabric scraps for other fun DIY projects!
IX. Screen-printing:
Screen printing is a fun and popular way to add unique designs or images to t-shirts. Unlike other DIY techniques, screen printing requires a bit more equipment and can be more time-consuming. However, with a screen printing kit and some creativity, you can create a truly one-of-a-kind t-shirt.
When it comes to choosing a screen printing kit, there are several options available. Some kits come with pre-made stencils or designs, while others allow you to create your own stencils. You should choose a kit that meets your needs, skill level, and budget. Some popular brands include Speedball and Jacquard.
Once you have your kit, you will need to gather the rest of the materials, which include a screen, squeegee, ink, emulsion, and stencil paper. You can purchase these items separately or as part of a kit.
The first step in the screen printing process is creating your stencil. You can either purchase pre-made stencils or create your own using stencil paper. You can draw your design directly onto the stencil paper or print it out using a printer. Once you have your design, you can cut it out using an X-acto knife or stencil cutter.
Next, you will need to prepare your screen. This involves applying a light-sensitive emulsion to the screen and letting it dry in a dark room for several hours. Once the emulsion is dry, you will place your stencil onto the screen, and then expose it to light. The light will cause the emulsion to harden, creating your stencil on the screen.
Once you have your screen and stencil prepared, you can start printing. Lay your t-shirt onto a flat surface, and then place the screen over the shirt, with the stencil facing down. Apply ink to the top of the screen, and then use a squeegee to spread the ink over the stencil and onto the shirt. Lift the screen off the shirt, and voila – you have a custom screen printed t-shirt!
Screen printing can take some practice to perfect, but once you get the hang of it, you can create truly unique and personalized t-shirts. It’s a great way to show off your creativity and make your old t-shirts feel new again.
X. Patchwork:
Patchwork is a great way to revamp old t-shirts and turn them into a unique and fun piece of clothing. With patchwork, you can take your old t-shirts and turn them into something new and exciting by adding a touch of creativity to the mix. To begin, gather all the old t-shirts you want to use and start cutting them up into small, usable pieces.
Once you have your pieces of scrap fabric, you can begin laying them out on a flat surface to determine how you want to arrange them. One method is to create a random pattern by selecting pieces of fabric and placing them next to each other. Another approach is to create a more structured pattern, such as stripes or a checkerboard. You can also try creating shapes and designs like hearts or stars by cutting the fabric into those shapes and arranging them into a pattern.
Next, you’ll want to sew the pieces of fabric together. Start by laying two pieces of fabric together, right sides facing each other, and sew them together using a straight stitch. Continue doing this until you have created a larger piece of fabric that you can use to create your t-shirt. You can use a sewing machine or sew by hand if you prefer.
After you have pieced together your scrap fabric, you can then attach it to your t-shirt. Cut out the shape of the t-shirt you want to use and lay it flat. Next, position the patchwork fabric on top of the t-shirt and sew it to the shirt using a zigzag stitch. This will ensure that it’s securely stitched to the shirt and will last a long time.
Finally, you can add any finishing touches you desire, such as embellishments, buttons, or other details that will make your patchwork t-shirt stand out. You can even add additional patches of fabric to the sleeves or the back of the shirt to make it even more unique.
In conclusion, patchwork is a great way to revamp old t-shirts and turn them into something new and exciting. With a little creativity and some simple sewing skills, you can take your old t-shirts and turn them into a unique and fun piece of clothing that you’ll love wearing. Whether you choose a random pattern or create a structured design, patchwork is a great way to breathe new life into your wardrobe. So why not start today and see what kind of patchwork t-shirts you can create?
XI. Conclusion:
You may feel like your old t-shirts are destined for the bin, but with a little imagination and effort, you can easily transform them into something new and stylish. In this article, we have provided ten easy DIY ways to revamp your old t-shirts.
From bleaching and tie-dyeing to embroidery and fringe, each technique offers a unique way to personalize your shirt and create a brand-new look. Whether you prefer a bohemian style or something a little more classic, these methods will help you create a t-shirt that suits your taste.
Recycling your old t-shirts is not only a fun and creative way to breathe new life into your old clothes but it is also an eco-friendly solution for reducing fabric waste. Reusing clothes helps lessen the impact of wasteful fashion practices and is a step towards a more sustainable future.
We encourage you to try out these easy DIY techniques and explore your creativity. These projects are perfect for a weekend or an evening with friends, using simple materials you may already have at home. Experiment with different colors, patterns, and textures, and have fun discovering new possibilities for your old t-shirts.
In conclusion, revamping old t-shirts is a simple and fun way to refresh your wardrobe and reduce waste. With just a few easy DIY techniques, you can create unique and stylish shirts that reflect your personality and fashion sense. We hope you have found these tips helpful and that they inspire you to start your own t-shirt revamping project!