I. Introduction
Custom graphic t-shirts have become a popular form of expression and style, offering a unique and personalized way for individuals to showcase their interests, beliefs, and personalities. With the rise of print-on-demand services and online marketplaces, the accessibility of creating custom graphic t-shirts has never been easier. However, many people opt to create their own custom graphic t-shirts with do-it-yourself (DIY) techniques, which allows the designer’s creative vision to come to life without limitations.
There are numerous benefits to creating your own graphic t-shirts. Firstly, custom graphic t-shirts offer a unique and personal touch to any wardrobe. By designing a t-shirt that reflects one’s own interests, hobbies, or beliefs, it becomes more than just a piece of clothing – it becomes a representation of oneself. Additionally, custom graphic t-shirts are a cost-effective means of obtaining unique apparel. With DIY techniques, individuals can achieve a professional-looking design without breaking the bank on designer or limited-edition t-shirts.
Another benefit of creating custom graphic t-shirts is the ability to sell them as a side-hustle or small business venture. For individuals interested in entrepreneurship or design, creating custom graphic t-shirts can be a great way to earn extra income or launch a small business. DIY techniques allow for the creation of one-of-a-kind designs that are ideal for niche markets or audiences that may not find what they’re looking for in mainstream stores.
Custom graphic t-shirts have also become a popular form of activism, particularly in recent years. From spreading awareness of social causes to showing support for marginalized groups, graphic t-shirts can be an impactful way to share a message or start a conversation. With DIY techniques, creating custom graphic t-shirts that support social justice causes or highlight important issues has never been easier.
Overall, creating custom graphic t-shirts offers a range of benefits – from personal style statements to entrepreneurial opportunities to activism. With the help of DIY techniques, anyone can design a t-shirt that reflects their individuality and style.
II. Design Considerations
Designing your custom graphic t-shirt is a fun and creative process that allows you to showcase your personality and unique style. There are a few key design considerations that you should keep in mind to ensure that your custom t-shirt turns out just the way you want it.
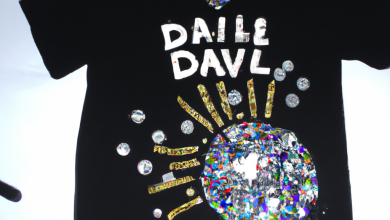
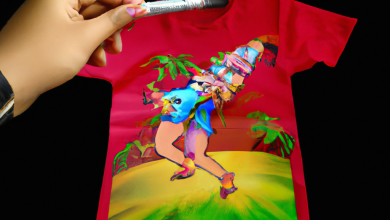
Choosing the right image or design: Your graphic t-shirt is essentially a canvas that allows you to showcase your creativity and imagination. Therefore, one of the most important design considerations is selecting the right image or design for your t-shirt. It can be a photograph, a logo, a witty text, or any image that you like. Choose a design that is meaningful to you and reflects your personality. You may also want to consider whether the design will resonate with your target audience or intended audience.
Importance of color selection: Color plays a crucial role in the effectiveness of your custom graphic t-shirt. The colors you choose will affect the overall look and feel of the shirt, as well as its readability and visibility. It is important to use high-contrast colors for the graphic and the t-shirt color itself. If you choose a design with a lot of detail, use colors that complement each other to help the design stand out.
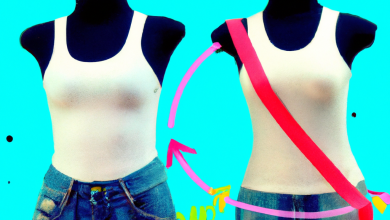
Placement of the design on the t-shirt: The placement of the design on the t-shirt is also important. You should consider the style of the t-shirt, whether it’s a crew neck or V-neck and how the design will look on the front, back or sleeves. Generally, printing the design on the front of the shirt is the most common option, but you can get creative in your placement to make your shirt stand out even more.
In summary, the key to designing a successful custom graphic t-shirt is selecting a design that’s meaningful and unique to you, using high-contrast colors that make the design pop, and choosing a good placement for the design on the shirt. These considerations will help you create a shirt that you’ll be proud to wear and show off to others.
III. DIY Techniques for Creating a Graphic T-Shirt
Creating a custom-designed t-shirt is certainly a fun, creative, and cost-effective way to express oneself. However, designing a graphic t-shirt oneself requires a specific set of skills and knowledge. In this section, we will describe four different DIY techniques that you can use to design your own graphic t-shirt.
Stenciling
A common DIY technique for designing a graphic t-shirt is stenciling. It is an easy and inexpensive method that involves cutting out a design from a cardboard or plastic stencil and then applying it to the t-shirt using fabric paint.
Start by creating a design on a blank paper or tracing the design onto the stencil paper. Cut out the design carefully, leaving enough space around the edges to avoid paint from bleeding outside the design. Place the stencil on the t-shirt and use masking tape to hold it in place. Dab the fabric paint onto the stencil with a sponge brush and make sure to cover every part of the enclosed area. After letting it sit for a few minutes, remove the stencil and let your t-shirt dry before wearing it.
Iron-on Transfers
Another method that you can use to create a graphic t-shirt is iron-transfer. For this method, you will need a transfer paper, printer, and an iron. Begin by printing the design on the transfer paper in mirror image. Once the image is printed, cut around the edge of the design. Place the image on the t-shirt with the transfer side down and position it where you want the design to be. Heat up the iron and press down on it for around 30 seconds, then slowly lift the paper to reveal your design.
Fabric Markers
Fabric markers are another option for creating a graphic t-shirt. It is a versatile and easy method that allows you to create a range of designs, patterns, and colors. This method is particularly ideal for young children because the markers are non-toxic and easy to use.
Start by either free-hand drawing the design directly onto the t-shirt or use a stencil for guidance. Use the fabric markers to color in the design, using small strokes for intricate details. Once the design is complete, let the fabric dry completely before wearing it.
Screen Printing
Screen Printing is a bit more complicated method that involves creating a stencil design on a mesh screen and transferring ink onto the t-shirt through the screen. You will need a pre-prepared stencil, screen printing ink, and a squeegee.
First, position the stencil onto the screen and secure it in place. Load the ink onto the screen and move the squeegee across the stencil in one stroke. The ink will pass through the open areas of the stencil onto the t-shirt beneath. Lift the screen and peel off the stencil to reveal your design.
In conclusion, each of the above DIY techniques comes with its own advantages and disadvantages. Stenciling and iron-on transfer methods are simple and easy to use, while fabric markers can be more versatile depending on the user’s skills. Screen printing usually produces more professional results, but requires more equipment and expertise. Pick a technique that best suits your preference and personality, and enjoy creating your own custom graphic t-shirt!
IV. Materials
Creating your own custom graphic t-shirt doesn’t have to be expensive or complicated. The materials you need will vary slightly depending on which DIY technique you choose to use, but in general, you’ll need the following:
1. Stenciling
– Stencil material: You can easily make your own stencil by printing out an image and cutting it out with a craft knife. Alternatively, you can purchase stenciling material or use adhesive vinyl.
– Paint: Choose a fabric paint that is suitable for the type of fabric you’re using.
– Tape: Masking tape or painter’s tape can be used to secure the stencil to the t-shirt.
2. Iron-on Transfers
– Transfer paper: This is a special paper that allows you to print your design and then transfer it onto the fabric.
– Printer: You can use an inkjet or laser printer to print your design onto the transfer paper.
– Iron: You will need an iron to transfer the design onto the fabric.
– T-shirt: Choose a t-shirt made of cotton or cotton blend, as these fabrics work best for iron-on transfers.
3. Fabric Markers
– Fabric markers: Choose a set of fabric markers in a variety of colors. You can also use fabric paint pens.
– Stencils or templates: If you’re not confident in your drawing abilities, you can use stencils or templates to create your design.
– T-shirt: As with the iron-on transfers, choose a cotton or cotton blend t-shirt.
4. Screen Printing
– Screen printing kit: This will include a screen, a squeegee, and ink.
– Transparency film: This is used to print your design onto.
– Exposure unit: This is used to expose your design onto the screen.
– T-shirt: As with the other techniques, choose a cotton or cotton blend t-shirt.
Cost-effective alternatives:
– Instead of purchasing stenciling material, use thick paper or cardboard.
– Look for sales or buy transfer paper in bulk to save money.
– Purchase a small set of fabric markers instead of a large set.
– If you can’t afford a screen printing kit, try using a stencil and fabric paint instead.
Remember that it’s important to choose the right materials for the specific technique you’re using to ensure the best results. With a little creativity and some basic supplies, you can create your own custom graphic t-shirt that is unique and personal to you.
V. Step-by-Step Guides
Creating a custom graphic t-shirt can be a fun and rewarding experience, and there are several different DIY techniques you can use to achieve the look you want. Here we’ll provide a step-by-step guide for each of the most popular techniques, along with some tips and tricks for getting the best results.
1. Stenciling
Stenciling is a simple and inexpensive way to create a custom graphic t-shirt. Here’s what you’ll need:
Materials:
– Blank t-shirt
– Stencil (you can buy one or make your own)
– Painter’s tape
– Fabric paint
– Foam brush
Step-by-Step Instructions:
1. Begin by placing the blank t-shirt on a flat surface and securing it with painter’s tape to prevent any shifting.
2. Place the stencil on the desired location on the t-shirt and secure it with painter’s tape.
3. Apply a small amount of fabric paint to the foam brush and carefully dab the paint onto the stencil, making sure to stay within the stencil’s borders.
4. Once you’ve filled in the entire stencil, carefully remove it from the t-shirt and allow the paint to dry completely.
5. If desired, you can add additional colors using a separate stencil.
Tips and Tricks:
– Use a dry brush to remove any excess paint before applying the stencil to prevent smudging.
– Use fabric-friendly adhesive spray to keep the stencil in place if painter’s tape isn’t enough to hold it down.
– Iron the t-shirt once the paint is dry to set the design and make it more durable.
2. Iron-on Transfers
Iron-on transfers provide a quick and easy way to create a custom graphic t-shirt without needing any artistic skills. Here’s what you’ll need:
Materials:
– Blank t-shirt
– Printed image or design
– Iron-on transfer paper
– Inkjet printer
– Iron
Step-by-Step Instructions:
1. Begin by printing your chosen image or design onto iron-on transfer paper using an inkjet printer.
2. Cut out the image or design as close to the edges as possible.
3. Preheat your iron to the highest setting.
4. Place the cut-out image or design face down on the desired location on the t-shirt.
5. Apply pressure with the hot iron for 20 to 30 seconds, making sure to apply pressure evenly across the entire design.
6. Remove the paper backing from the transfer once the design has cooled down.
Tips and Tricks:
– Print the image in mirror mode to ensure it will transfer correctly onto the t-shirt.
– Avoid using steam as it can damage the transfer or cause the design to shift.
– Peel the transfer paper off slowly and carefully to prevent any damage to the design.
3. Fabric Markers
Fabric markers are a versatile and easy-to-use option for creating a custom graphic t-shirt. Here’s what you’ll need:
Materials:
– Blank t-shirt
– Fabric markers
– Pencil or washable marker
– Cardboard or newspaper
Step-by-Step Instructions:
1. Begin by placing a piece of cardboard or newspaper inside the t-shirt to prevent any color bleeding to the back.
2. Use a pencil or washable marker to sketch your chosen design onto the t-shirt.
3. Choose the appropriate colors and carefully outline the design with fabric markers.
4. Fill in the design with the appropriate colors.
5. Allow the fabric markers to dry completely.
Tips and Tricks:
– Use a light touch when applying the fabric markers to prevent bleeding.
– Place a piece of cardboard or newspaper over the design as you work to prevent smudging.
– Wash the t-shirt inside-out in cold water to ensure the longevity of the design.
4. Screen Printing
Screen printing provides a professional look for custom graphic t-shirts and can be done at home with the right equipment. Here’s what you’ll need:
Materials:
– Blank t-shirt
– Screen printing frame
– Screen printing ink
– Squeegee
– Image or design to print
– Masking tape
Step-by-Step Instructions:
1. Begin by placing the t-shirt on a flat surface and securing it with masking tape to prevent it from shifting.
2. Attach the screen printing frame to the image or design you want to print.
3. Apply a generous amount of ink to one end of the frame, above the design.
4. Use a squeegee to drag the ink over the design, applying even pressure.
5. Lift the frame carefully to reveal the printed design on the t-shirt.
6. Allow the ink to dry completely.
Tips and Tricks:
– Choose a high-quality ink that will provide a vibrant and long-lasting design.
– Apply even pressure with the squeegee to prevent uneven ink coverage.
– Cover the remaining parts of the frame with masking tape to prevent any accidental prints.
V. Conclusion
By choosing one of these DIY techniques, you can easily create your own custom graphic t-shirts and show off your creativity and style. With a little practice and patience, you can create t-shirts that are truly unique and express your personality. Always remember to follow the care instructions for your t-shirts to ensure they stay looking their best for as long as possible.
VI. Caring for Your Graphic T-Shirt
Now that you have created your own custom graphic t-shirt, it is important to ensure that your design holds up over time. Proper care for your t-shirt is essential to ensure that your design lasts as long as possible. Here are some guidelines for washing and drying your t-shirt and tips for ensuring the design lasts long.
Guidelines for Washing and Drying Your T-Shirt
It is recommended to wash your t-shirt before wearing it for the first time. Here are some general guidelines for washing and drying your t-shirt:
1. Always read the care instructions on the label of your t-shirt before washing it.
2. Turn your t-shirt inside out before washing.
3. Wash your t-shirt in cold water on a gentle cycle to avoid damaging the design.
4. Use a mild detergent to prevent fading or bleeding of colors.
5. Avoid using fabric softeners as they can damage the design and weaken the fibers of the t-shirt.
6. When drying your t-shirt, line dry it whenever possible, as the sun helps to bleach out any stains and remove odors naturally.
7. If you do have to use a dryer, use a low heat setting, and avoid over drying or the design may crack or fade.
8. Once your t-shirt is dry, store it folded or hung on a hanger.
Tips for Ensuring the Design Lasts Long
1. Choose high-quality t-shirts with a high cotton content. Cotton is a sturdy fabric that can handle frequent washing and drying.
2. Avoid using harsh chemicals or bleach on your t-shirt as this can damage the design and weaken the fabric of your t-shirt.
3. Turn your t-shirt inside out before washing to minimize friction and protect the design.
4. Avoid rubbing your t-shirt excessively while washing it, as this can cause the design to peel or crack.
5. Remove any stains immediately to prevent them from setting into the fabric.
6. Consider dry cleaning, especially for t-shirts with delicate designs that cannot withstand frequent washing and drying.
In conclusion, by following these simple steps, you can ensure that your custom graphic t-shirt looks great and lasts long. Proper care for your t-shirt is essential to maintain the quality of your design and keep your t-shirt looking fresh and vibrant.
VII. Conclusion
Creating your own custom graphic t-shirts is not only a fun and creative way to express yourself, but it also allows you to have a unique piece of clothing that nobody else will have. With the DIY techniques outlined in this article, you can create your own custom graphic t-shirts with ease.
To recap, the four DIY techniques covered in this article are stenciling, iron-on transfers, fabric markers, and screen printing. Each technique requires different materials and has its own set of pros and cons. However, with the right materials and techniques, anyone can create a custom t-shirt that is truly one of a kind.
If you’re looking for a cheap and easy way to create your own custom t-shirt, then stenciling or fabric markers may be the best option for you. If you want something more complex and professional-looking, then screen printing may be the way to go.
To ensure that your custom graphic t-shirt lasts as long as possible, make sure to always follow the instructions for washing and drying, and use quality materials. By caring for your custom t-shirt, you can wear it for years to come and show off your unique style.
So, what are you waiting for? Get creative and start designing your own custom graphic t-shirts today! Experiment with different techniques and designs until you have created the perfect t-shirt that reflects your style and personality.
In conclusion, creating your own custom graphic t-shirts with these DIY techniques is both easy and fun. Whether you’re looking to make a statement with your wardrobe or just want to have a unique piece of clothing, custom graphic t-shirts are a great option. With the right materials and techniques, you can create a high-quality t-shirt that you’ll be proud to wear.