I. Introduction
Tie-dye has been a popular technique for adding a splash of summer color to t-shirts for decades. It’s a fun and creative way to personalize your wardrobe and express your individuality. Tie-dyeing a t-shirt is a great summer project for both adults and kids, and it can be done in the comfort of your own home. In this article, we’ll provide a step-by-step guide to creating tie-dye t-shirts using a range of colorful dyes and different tying techniques.
Explanation of tie-dye technique:
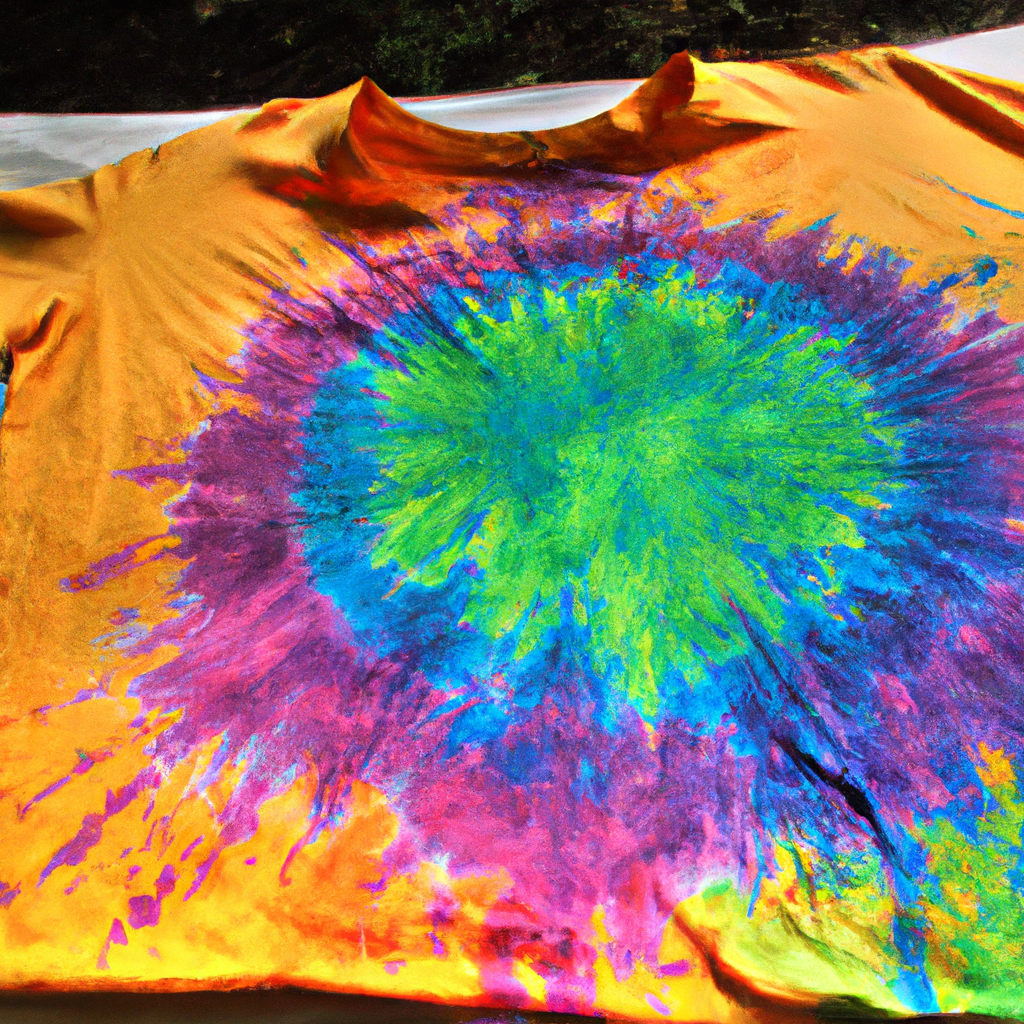
Tie-dye is a method of dyeing fabrics by binding sections of the fabric with string or rubber bands, then applying dye to create a colorful pattern. There are several different techniques for creating tie-dye patterns, including crumple, swirl, bullseye, and more. Each technique creates a unique and different design on your t-shirt.
List of materials needed:
Before we dive into the tie-dyeing process, it’s important to have all the necessary materials on hand. The following is a list of items you’ll need to complete the tie-dyeing process:
1. A white t-shirt made of natural fibers like cotton, rayon, or hemp.
2. Dye – there are many different types of dyes available, but for this project, we recommend using fiber reactive dyes as they provide the most vibrant and long-lasting colors.
3. Rubber gloves – to protect your hands from dye.
4. Rubber bands – to bind sections of the t-shirt.
5. Plastic squeeze bottles – to hold the dye solution.
6. Large plastic bags – to store the tie-dye t-shirts while they set.
7. A bucket – to mix the dye in.
8. A stirring stick – to stir the dye mixture.
9. A trash bag or tarp – to protect your work surface.
10. Optional: Fabric softener or laundry detergent – to help set the dye.
Now that we have a list of materials, we’re ready to start creating our very own tie-dye t-shirts.
II. Choosing the Right T-Shirt
Tie-dyeing can be done using a variety of fabrics, including cotton, rayon, and linen. However, cotton is the most commonly used fabric, as it tends to take dye better and produce brighter colors. When selecting a t-shirt, it is important to consider the type of fabric, as well as the color and style of the shirt.
Fabric Considerations
For the best results, choose a t-shirt that is made of 100% cotton. Avoid shirts with blended fabrics, as they may not take the dye evenly. Cotton is a natural fiber that takes dye well, producing vibrant and long-lasting colors. It is also a breathable fabric that is comfortable to wear in warmer weather.
Preparing the T-Shirt for Dyeing
Before tie-dyeing a t-shirt, it is important to prepare it properly. First, wash the shirt in warm water to remove any dirt or residue. Do not use fabric softeners, as they can affect the way the dye takes to the fabric. If the shirt is new, it is recommended to wash it several times to remove any excess starch or sizing.
Next, soak the shirt in a mixture of warm water and soda ash. Soda ash is a chemical that helps to open up the fibers in the fabric, allowing the dye to penetrate more deeply. Follow the instructions on the soda ash package for mixing and soaking times. After soaking, wring out the excess water, but do not rinse the shirt.
Finally, lay the shirt flat on a clean surface and smooth out any wrinkles or folds. This will ensure that the dye is applied evenly to the entire shirt. If there are any areas of the shirt that you do not want to dye, cover them with tape or rubber bands before proceeding to the next step.
III. Preparing the Dye
Tie-dyeing requires a type of dye that can penetrate and bond with the fabric, creating vibrant colors that will last for several washes. There are different types of dye available in the market, and each has its advantages and disadvantages. Here are three common types of dyes to choose from:
1. Procion MX Dye – This type of dye is specifically created for tie-dyeing and is the most popular choice among tie-dye enthusiasts. Its dye molecules penetrate the fabric’s fibers, creating a permanent and vibrant bond that lasts for several washes.
2. Fiber Reactive Dye – This type of dye is also designed for fabric dyeing and is excellent for cotton and other cellulose fibers. Similar to Procion MX, Fiber Reactive Dye penetrates the fabric’s fibers and creates a permanent bond.
3. Natural Dyes – If you prefer a more eco-friendly approach to tie-dyeing, natural dyes may be an option for you. Natural dyes come from plant materials such as fruits, flowers, and vegetables. They can produce beautiful colors; however, they aren’t as strong as Procion MX or Fiber Reactive Dye.
Once you’ve chosen the type of dye that suits your project, the next step is to mix and prepare it. Mixing the dye is one of the essential aspects of the tie-dyeing process. The wrong proportions of dye and water can produce uneven colors, ruining your design. Here are some tips for mixing and preparing dye:
1. Read the Instructions – Different types of dye may have different instructions for mixing and preparing. Be sure to read the package instructions carefully.
2. Use the Correct Proportions – Proportions vary depending on the dye’s concentration and the amount of water needed for your project. As a general rule, follow the instructions on the package to achieve the desired color concentration.
3. Add Salt or Soda Ash – To enhance the dye’s bonding properties, consider adding salt or soda ash (also known as sodium carbonate). Both salt and soda ash can help the dye penetrate the fabric fibers more effectively.
4. Use Appropriate Equipment – When preparing the dye, use separate equipment such as measuring cups, spoons, and mixing bowls to avoid cross-contamination of colors.
By following these tips, you can properly mix and prepare the dye for your tie-dye project, ensuring that your colors will be bright and long-lasting.
IV. Creating a Design
Once you’ve chosen your t-shirt and prepared the dye, it’s time to create a design for your tie-dye masterpiece. There are countless ways to create tie-dye designs, but here are some popular patterns to get you started:
1. Spiral – The spiral pattern is a classic tie-dye design that is easy to create. To make a spiral pattern, pinch the center of the shirt and twist it clockwise, creating a coil. Begin tying the shirt in sections around the coil until the entire shirt is tied up. Apply dye generously to the tied sections.
2. Stripes – A striped tie-dye pattern is created by folding, twisting, or tying the shirt vertically or horizontally. Tie the areas you do not want to dye tightly and apply the dye to the exposed areas.
3. Bullseye – A bullseye pattern is created by tying the shirt in several sections with rubber bands, creating multiple concentric circles. Apply the dye to the sections and let it absorb before rinsing.
Once you’ve mastered these basic patterns, don’t be afraid to get creative and make your own unique designs. Experiment with different folding techniques, combining patterns, or dye application methods. Using stencils or rubber stamps can also add interesting details to your designs.
When creating your design, keep in mind that the way you tie the shirt will affect the final result. The more tightly the shirt is tied, the more white space will remain. If you want more color, go for looser ties or use a spray bottle to apply dye in between the tight areas.
Above all, have fun with the process and embrace the imperfection that comes with tie-dyeing. Each design will be unique and add a personal touch to your summer wardrobe.
V. Tying and Dyeing the T-Shirt
Once you have chosen your t-shirt and prepared the dye, it’s time to start the fun part: tying and dyeing the shirt! Here are some step-by-step instructions for tying the shirt:
Step 1: Decide on Your Tie-Dye Pattern
Before tying the shirt, you need to decide what pattern you want to create. There are several popular tie-dye patterns like the spiral, the bullseye, and the crumple. You can also create your own unique design. Once you have decided on your pattern, you can start tying your shirt.
Step 2: Create the Ties
There are different ways to tie a shirt for dyeing, depending on the pattern you want to create. You can use rubber bands or strings to create the ties. For example, to make a spiral pattern, take the center of the shirt and twist it until the shirt is completely twisted into a spiral. Then, use rubber bands to secure the shirt in place.
Step 3: Apply the Dye
Now it’s time to apply the dye! You can apply the dye using different techniques like squirt bottles, brushes, or dipping the shirt into the dye. Make sure to apply the dye evenly to the entire shirt, covering all the tied sections.
Step 4: Let the Dye Set
After applying the dye, you need to let the shirt sit for a while to allow the dye to set. The longer you let the shirt sit, the more vibrant the colors will be. Make sure to check the instructions for your dye to see how long you should leave the shirt to set.
Step 5: Rinse and Unwrap the Shirt
Once the dye has set, it’s time to rinse and unwrap the shirt. Remove the ties carefully and rinse the shirt under cold water until the water runs clear. You can also use a color fixative to help the dye set even more.
And that’s it! With these simple steps, you can create your own unique tie-dye t-shirt. It’s important to remember that every tie-dye project is different, and some experimentation may be necessary to achieve your desired results. But with a little patience and creativity, tie-dyeing can be a fun and rewarding summer project.
VI. Setting the Dye
Setting the dye is an essential step in the tie-dyeing process. It ensures that the colors remain vibrant and long-lasting, even after multiple washes. Properly setting the dye is crucial because it can affect the final outcome of your tie-dye t-shirt.
The Importance of Proper Setting
If you skip the setting process or do it incorrectly, your t-shirt may lose its brightness and the colors may start to bleed. This can ruin your tie-dye design and your hard work. Therefore, it is important to pay close attention to the setting process so that you can enjoy your vibrant tie-dye t-shirt for years to come.
Different Setting Methods
There are a few different methods you can use to set the dye, including:
1. Heat Setting
Heat-setting involves exposing the dyed fabric to high temperatures, usually by placing it in a clothes dryer or using an iron. This method works best for cotton and other natural fabrics. You should follow the instructions on the dye package for the recommended temperature and time needed to heat-set.
2. Cold Water Soak
Cold water soaking method involves soaking the dyed fabric in a vinegar and water solution. Vinegar helps to set the dye by lowering the pH level. You should follow the instructions on the dye package for the recommended vinegar and water ratio and soak time needed for your specific dye.
3. Microwave Method
The microwave method is a quick and easy way to set small tie-dye projects. Simply wet the dyed fabric, wrap it in a paper towel, and place it in the microwave for a few minutes. This method works best for small projects like bandanas, socks, and headbands.
4. Washing and Drying
Washing and drying is the most common method for setting the dye. Once the dye has been applied, allow the fabric to sit for about 24 hours before washing it in cold water. After washing, the fabric should be tumble-dried on low heat. This method is suitable for both natural and synthetic fabrics.
In conclusion, setting the dye is a crucial step in the tie-dyeing process to ensure that the colors do not bleed or fade. You should follow the recommended setting method for your specific dye and fabric type to ensure the best results. Proper setting, combined with the right design and preparation, will result in a beautiful, long-lasting, and stylish tie-dye t-shirt.
VII. Washing and Drying
After completing the tie-dye process, the next step is to wash and dry the t-shirt. This is an essential step in the process, as proper washing and drying ensure that the dye stays vibrant for as long as possible.
The first step in washing tie-dye shirts is to remove any excess dye. To do this, rinse the shirt in cold water until the water runs clear. It’s important to use cold water during this step, as hot water can cause the dye to bleed and fade.
Once the excess dye has been removed, wash the t-shirt by itself in cold water. It’s important not to mix the tie-dye shirt with any other clothing items, as the dye may bleed onto other clothes. Use a mild detergent, and avoid using bleach or fabric softener, as these can damage the dye and cause it to fade.
After washing, it’s important to properly dry the t-shirt. The best way to do this is to air-dry the shirt. Hang it up in a well-ventilated area, and avoid exposing it to direct sunlight. Exposure to sunlight can cause the dye to fade, so it’s important to keep the shirt out of direct sunlight during the drying process.
If you need to speed up the drying process, you can use a dryer. However, it’s important to use a low heat setting to avoid damaging the dye. Additionally, make sure the shirt is turned inside out before putting it in the dryer. This will help to protect the dye from direct heat and tumbling.
After the shirt is fully dry, it’s important to store it properly. Store the tie-dye shirt away from direct sunlight, as exposure to sunlight can cause the dye to fade. You can also fold the shirt in a way that helps to prevent any creases or wrinkles from forming.
In conclusion, washing and drying tie-dye shirts is a critical step in maintaining the vibrancy of the dye. By properly rinsing, washing, and drying the shirt, you can ensure that the dye stays bright and bold for as long as possible. Remember to air-dry the shirt whenever possible, and avoid exposing it to direct sunlight during the drying process.
VIII. Tips and Tricks
Tie-dyeing is a fun and creative activity, but it can be frustrating if the results don’t turn out as expected. Here are some tips and tricks to help troubleshoot common tie-dyeing issues and personalize your t-shirts:
1. Uneven Dyeing: If the dye is not penetrating evenly, the most likely culprit is that the fabric is not wet enough. Make sure to saturate the fabric thoroughly before dyeing. Additionally, manipulating the tied fabric gently while dyeing can help ensure even coverage.
2. Colors Blending Together: Using too much dye or allowing colors to overlap can cause colors to bleed together, resulting in muddy or undesired tones. Be mindful of the amount of dye you’re using, and consider using different squeeze bottles or droppers to apply dye and minimizing overlap.
3. Colors Fading: If your colors fade after washing, it’s likely because the dye was not set properly. Rinse the shirt in cold water before washing, and consider using a fabric fixative or soda ash solution to set the dye.
4. Personalize Your Tie-Dye: While there are lots of classic tie-dye patterns to choose from, don’t be afraid to personalize your t-shirt with your own unique pattern. Use rubber bands or string to create your own patterns, or try stenciling or painting on top of the tie-dye for a layered effect.
5. Accessorize Your Tie-Dye: Once you’ve mastered the art of tie-dyeing, take it to the next level by using your tie-dyed t-shirt as a canvas for other DIY projects. Try adding fringe, beading, or embroidery to create a one-of-a-kind look. You can also turn your tie-dyed fabric into headbands, bags, or other accessories for a complete tie-dyed ensemble.
Tie-dyeing is a fun and accessible DIY project that’s perfect for summer. With a little creativity and some basic materials, you can create your own personalized tie-dyed t-shirts and accessories. Don’t be afraid to experiment and try new techniques – the possibilities are endless!
IX. Conclusion
Tie-dyeing t-shirts is an excellent way to engage in a fun and creative summer project. With just a few materials and easy-to-follow steps, you can achieve unique and vibrant designs that will impress your friends and family.
There are several benefits of tie-dyeing, making it a perfect summer project. First, it is a great way to express your creativity while spending time with family or friends. Tie-dyeing can be a social activity where you can bond with others over the process of creating something unique and beautiful.
Second, tie-dyeing allows you to personalize your clothing and express your individuality. Instead of purchasing a generic t-shirt from a store, you can create a one-of-a-kind piece that reflects your personality and style.
Tie-dyeing can also be therapeutic and relaxing. The process of tying and dying can be very meditative, allowing you to clear your mind and focus on the task at hand. Additionally, seeing your finished creation can give you a great sense of accomplishment and satisfaction.
Lastly, tie-dyeing is a sustainable and eco-friendly way to update your wardrobe. Instead of buying new clothes, you can upcycle old t-shirts and give them a new life by transforming them into unique pieces.
In conclusion, tie-dyeing t-shirts is an enjoyable and easy summer project with numerous benefits. With a little creativity and some patience, you can create a bold and fun design that reflects your own personal style. So grab some friends, pick out some favorite colors, and get started on your next tie-dye adventure!