I. Introduction
T-shirts are a staple in any wardrobe, and they’re popular for a reason. They’re comfortable, versatile, and can be dressed up or down for any occasion. From plain white tees to graphic tees with bold designs, they come in many different styles, colors and sizes.
However, wearing the same t-shirts over and over can become boring, which is why transforming them with simple DIY ideas can add a touch of uniqueness and creativity to an otherwise ordinary outfit. Whether you’re looking to refresh your wardrobe or simply want to try your hand at a new hobby, transforming your t-shirts with these DIY ideas can be a fun and engaging activity.
In this article, we’ll cover a variety of DIY techniques that you can use to transform your t-shirts in simple and creative ways, including bleaching techniques, embroidery, screen printing, tie-dye, and fabric markers and paints. Each section will provide step-by-step instructions, as well as tips for achieving the desired effect.
Transforming your t-shirts with DIY ideas is not only a fun way to unleash your creative side, it’s also an eco-friendly way to give new life to old clothing items, reducing waste and contributing to sustainability efforts. Plus, the sense of accomplishment and personalization that comes with creating something unique and one-of-a-kind is invaluable and can boost your mood and confidence.
So, get ready to unleash your inner artist and transform your t-shirts with these simple DIY ideas. Whether you’re looking to experiment with bold new designs or simply add a personal touch to a plain t-shirt, there’s something for everyone in this article.

II. Bleaching Techniques
Bleaching is a simple yet effective technique to transform your plain-old t-shirt into something unique and edgy. It involves removing or lightening the dye from the colored fabric, creating contrast and design. Here’s how to create different designs using this technique.
The Ombre Effect
The ombre effect is a popular style that involves gradually blending colors from light to dark, creating a fading or gradient effect. Here’s how you can create the ombre effect using bleach.
Materials needed:
– Spray bottle
– Fabric-safe bleach solution
– Stencils (optional)
Instructions:
1. First, choose the part of the t-shirt where you want to create the ombre effect. You may choose the bottom, middle, or top part of the shirt.
2. Fill a spray bottle with fabric-safe bleach solution. You can dilute the bleach with water to achieve your desired strength.
3. Spray the bleach solution on the selected area of the t-shirt. Start spraying from the bottom or the area where you want to start the fading effect.
4. Continue spraying while slowly moving upwards until you reach the desired ombre effect.
5. Let the bleach sit for about 5-10 minutes or until you achieve the desired effect.
6. Rinse the t-shirt with cold water and let it dry.
Tie-Dye with Bleach
Another way to create interesting designs on your t-shirt using bleach is by tie-dyeing. Here’s how you can create a tie-dye design using bleach.
Materials needed:
– Rubber bands
– Fabric-safe bleach solution
– Large bucket or container
– Disposable gloves
Instructions:
1. Twist or fold the t-shirt into a desired pattern and tie it in place with rubber bands.
2. Pour fabric-safe bleach solution into a container.
3. Submerge the tied t-shirt in the bleach solution, making sure to fully saturate it.
4. Let the t-shirt soak for about 5-10 minutes, or until you achieve the desired color.
5. Remove the t-shirt from the bleach solution and rinse with cold water until the water runs clear.
6. Remove the rubber bands and let the t-shirt dry.
Stenciling with Bleach
Stenciling is another way to create fun and unique designs on your t-shirt using bleach. Here’s how you can create a stenciled design using bleach.
Materials needed:
– Stencils
– Fabric-safe bleach solution
– Spray bottle
– Disposable gloves
Instructions:
1. Choose a stencil design and place it on the t-shirt where you want the design to appear.
2. Fill a spray bottle with fabric-safe bleach solution.
3. Spray the bleach solution over the stencil, making sure to cover the entire design.
4. Let the bleach sit on the shirt for about 5-10 minutes or until the desired effect is achieved.
5. Remove the stencil and rinse the t-shirt with cold water until the water runs clear.
6. Let the t-shirt dry before wearing or washing.
Tips for Achieving the Perfect Bleach Effect
– Always use fabric-safe bleach to avoid damaging the fabric.
– Use gloves to protect your hands from bleach.
– Start with a lighter bleach concentration and adjust as necessary.
– Always rinse bleach out with cold water to stop the bleaching action.
– Do not overdry the t-shirt after bleaching, as it can cause the fabric to become brittle and crack.
III. Embroidery
Embroidery is a traditional art form that involves stitching designs onto fabric using a needle and thread. It has been used for centuries to decorate clothing, accessories, and household items, and is still popular today, especially among those who enjoy creating unique and personalized designs on their t-shirts.
One of the benefits of embroidery is that it allows you to add texture and dimension to your t-shirt designs. By using different stitches and thread colors, you can create a variety of patterns and designs that stand out from other types of DIY t-shirt decorations. Additionally, embroidery is a durable and long-lasting decoration method that can withstand repeated washing and wearing.
To get started with embroidery on a t-shirt, you will need a few basic supplies, including a t-shirt, embroidery floss, embroidery hoop, needle, and embroidery design pattern (which can be found online or purchased from a craft store).
Begin by placing your t-shirt in the embroidery hoop, making sure the fabric is smooth and taut. Thread your needle with the embroidery floss, and choose the stitch you want to use for your design. Common embroidery stitches include backstitch, running stitch, and satin stitch, which are all easy to learn and execute.
Next, follow the design pattern you have chosen, stitching along the lines to create your design. Start at one end of the design and work your way across, using small, neat stitches to create a clean and professional look. As you work, be sure to keep your stitches even and consistent, and use a thread color that complements your t-shirt.
When you are finished stitching your design, carefully remove your t-shirt from the embroidery hoop and trim any excess thread from the back. Your embroidered t-shirt is now ready to wear and show off!
Some tips for choosing the right embroidery design and thread colors include selecting a design that fits the size and shape of your t-shirt, choosing thread colors that contrast with your t-shirt color, and experimenting with different stitch types and patterns to create your own unique look.
Overall, embroidery is a fun and rewarding way to transform a plain t-shirt into a one-of-a-kind creation. With a little practice and creativity, you can achieve stunning results that showcase your individual style and personality.
IV. Screen Printing
Screen printing is a popular DIY technique that allows you to print a design onto a t-shirt using a stencil, paint, and a screen. This technique is great for creating bold designs with sharp, clean lines. Here’s a step-by-step tutorial for screen printing on a t-shirt:
Materials:
– A screen
– A squeegee
– Fabric paint
– Painter’s tape
– A stencil
– A t-shirt
– A piece of cardboard or newspaper
Steps:
1. Choose a design: Design your own stencil or use a pre-made one. You can also use painter’s tape to cover the parts of the screen where you don’t want paint to go through.
2. Set up your screen: Place your screen on top of your t-shirt. Make sure it is centered and straight. Secure it in place with tape.
3. Add paint: Add a small amount of paint to the top of your screen. Use your squeegee to spread it evenly across your stencil.
4. Print your design: Press down on your squeegee and drag it down the length of your screen. This will push the paint through the stencil and onto your t-shirt.
5. Repeat: Repeat steps two through four for each color you want to use in your design.
6. Dry: Allow your paint to dry completely per the manufacturer’s instructions.
7. Set the paint: If you want your print to be permanent, you’ll need to set the paint. Turn your t-shirt inside out and iron it on high heat for 3-5 minutes.
Tips for choosing the right paint and stencils for screen printing:
– Choose a fabric paint that is designed for use on t-shirts and that is compatible with the type of fabric you’re using.
– Consider the size and style of your stencil. A smaller, intricate design may be harder to print accurately than a larger, simpler design.
– Start with a simpler design before moving onto more complicated ones.
– Use a piece of cardboard or newspaper inside your t-shirt to prevent paint from bleeding through to the back.
V. Tie-Dye
Tie-dye is a popular DIY technique that involves dying fabrics in vibrant colors and creating unique patterns. Tie-dying has been popular for decades, making it a classic way to add personality to a plain t-shirt. The technique is not only simple but also affordable, and it only requires a few items. Here is a step-by-step tutorial to creating different tie-dye designs on a t-shirt while achieving the desired effect.
Step 1: Choose a Tie-Dye Kit and Read the Instructions
Choose a tie-dye kit that suits your preferences, and read the instructions. Most kits come with dye, gloves, rubber bands, and easy-to-follow instructions.
Step 2: Wet the T-Shirt
To achieve a perfect tie-dye design, you should wet the t-shirt before tying it. Wetting the t-shirt ensures that the dye penetrates evenly and creates a consistent color. After wetting your t-shirt, ring it to get rid of any excess water.
Step 3: Folding Your T-Shirt
Tie-dyeing involves folding the t-shirt in different ways to create various patterns. You can fold the t-shirt in accordion-like pleats, rolls, or anything as long as it results in a unique pattern. Pinching fabric is also useful in creating unique patterns.
Step 4: Add Your Tie-Dye Patterns
Now that your t-shirt is folded to your liking, it is time to add the tie-dye. Put on your gloves and mix the dye following the kit’s instructions. Squirt the dye onto the different parts of the t-shirt, ensuring it seeps through the crevices. When doing this, ensure that you flip the t-shirt over to add the dye evenly on both sides.
Step 5: Cover the T-Shirt and Let It Set
To prevent the dye from bleeding or drying prematurely, cover the t-shirt in plastic wrap or a plastic bag. Let the dye set for about six to eight hours or the time specified in your kit’s instructions.
Step 6: Rinse and Wash
After the designated time, rinse the t-shirt under running water while still tied to eliminate excess dye until the water runs clear. Then untie it and rinse it again before washing in a machine using cold water and a gentle detergent. Hang or lay the t-shirt flat to dry, ensuring it does not get exposed to direct sunlight.
Tie-dye is an excellent way to add a unique, colorful touch to your plain t-shirt. Take advantage of the different folds, techniques, and dyes to create unique tie-dye designs that suit your personality. With the tips provided, you should be able to create a vibrant tie-dye t-shirt with ease, and it is an enjoyable process to undertake.
VI. Fabric Markers and Paints
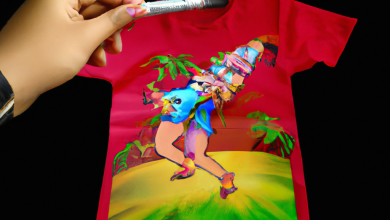
Fabric markers and paints are versatile tools that can be used to create intricate designs on your t-shirt. They come in many colors, allowing for endless possibilities. Here’s a step-by-step tutorial for using fabric markers and paints to create unique and personalized designs on your t-shirt.
1. Choose your t-shirt:
Start by choosing a t-shirt that you want to decorate. It can be an old or new t-shirt, but make sure it’s made of a fabric that can be painted on, such as cotton or polyester. Wash and dry the shirt before painting to remove any dirt or chemicals that may interfere with the painting process.
2. Plan your design:
Decide on the design you would like to create on your t-shirt. You can draw inspiration from various sources, such as online images, your favorite patterns, or even your own drawings. Sketch out your design on paper so that you have a rough idea of what you want to create. This step is crucial for ensuring that you don’t make mistakes when painting on the t-shirt.
3. Gather your materials:
Next, gather all the materials you’ll need, including fabric markers and paints, paint brushes, stencils, and masking tape. You can purchase these items from your local craft store or online. Make sure that you have the colors that match your design and that the fabric markers and paints are suitable for the type of fabric you’ll be painting on.
4. Start painting:
Using your sketch as a guide, start painting your design onto your t-shirt. You can use stencils or free-hand your designs. Use a fine-tipped fabric marker for detailed designs and a larger brush for bigger designs. Go slow and use a light touch. Be patient, and build your design as you go.
5. Finish up:
Once you’ve finished painting, let your t-shirt dry for several hours or overnight. Once it’s dry, iron it on the reverse side to set the colors. This will make the paint adhere to the fabric more securely and will ensure that the design doesn’t wash out when you launder your t-shirt.
Tips for choosing the right colors and achieving the desired effect
– When choosing your colors, consider how they will complement each other and your design. Always test your colors on a separate piece of fabric before applying them to your t-shirt.
– Use light colors on dark fabrics and dark colors on light fabrics to make your designs more visible.
– You can use different fabric markers and paints to achieve different effects, such as metallic or glow-in-the-dark finishes.
– Experiment with different techniques, such as shading and blending, to achieve a unique and personalized look.
– Practice on a scrap piece of fabric before you paint on your t-shirt to ensure that you are comfortable with the materials and techniques.
– Be patient and take your time, especially when working with detailed designs.
In summary, fabric markers and paints are a great way to personalize your t-shirts and create unique designs. With some patience and practice, you can create stunning designs that will make your t-shirt stand out from the crowd.
VII. Conclusion
After exploring different techniques for transforming t-shirts, it is important to recap and highlight the importance of incorporating these DIY ideas. With the rise of fast fashion and the monotony of mass-produced clothing, transforming t-shirts is an easy and affordable way to express your creativity and individuality.
Bleaching is a technique that can be used to create different designs such as ombre or tie-dye. Embroidery is perfect for adding intricate and personalized details to plain t-shirts. Screen printing offers a way to apply images or text onto t-shirts and is ideal for creating custom t-shirts for events or small businesses.
Tie-dye is a classic way of transforming t-shirts that has gained popularity in recent years. Fabric markers and paints offer an easy way to create unique designs using free-hand drawing or stencils.
The importance of experimenting with different techniques cannot be overstated. It enables you to explore and discover your own creativity and can be therapeutic. Furthermore, it offers a way to create clothing that is tailor-made for you.
In conclusion, transforming t-shirts is an ideal way to express your creativity while also creating unique pieces of clothing. It is cost-effective and fun, resulting in one-of-a-kind pieces that you can wear with pride. We encourage readers to try out these DIY ideas on their own and explore the limitless possibilities of transforming their t-shirts. We hope that this article has inspired you to take a closer look at the t-shirts you own and see them as potential canvasses for your own creative expression.


